 So, now we have teenagers, I’ve realised a need to create a little more separation within our home network. The intent of this is to give them a segment of the network where they can connect their wireless devices, use the internet and allow their friends to also connect their devices when they visit.
With freedom comes responsibility, so we also want to be able to enforce limits on the hours of use, conserve bandwidth, and attempt to protect them from malware and viruses.
Future enhancements may include traffic reporting, content filtering – but for now we want to get them off the core network, and onto their own segment.
Currently, our home networks looks a little like this:
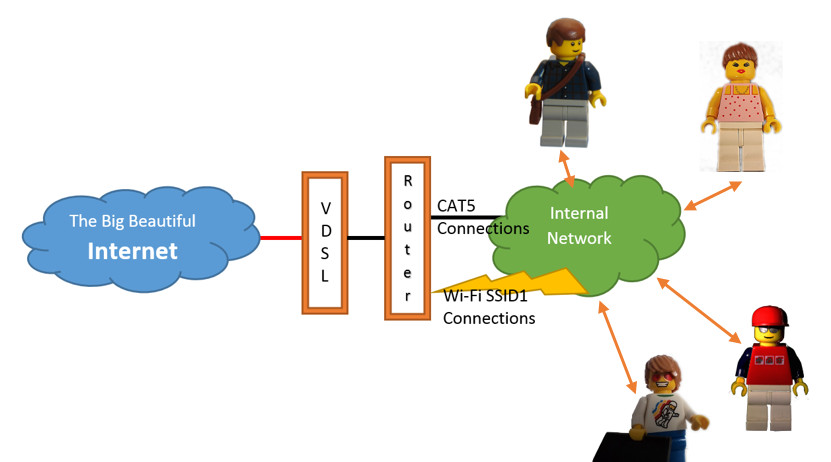
All users are connected to the same pool of network addresses, and all users can access all resources on the network (according to the resources security and requirements for credentials).
To achieve our goal, I have resurrected an old DELL Dimension 4600 (x86, 2GB RAM, 2x 500GB HDD) and dropped in two additional network cards. We will be loading pfSense v2.1.4 onto the box, connecting one network card to our internal network, and using the other two to serve the new network segment and pass requests through the firewall and into our internal network, where they will in turn be routed out to the Internet or any internal resources (such as our network printer).
First Boot:
- Grab the latest pfSense ISO image for our machine and burn it to a CD. In our case, this was the i386 flavour (as it’s an embarrassingly old processor)
- Plug in a monitor and keyboard, then boot the machine from the CD
- You will be presented with a Select ‘1’ from the menu to ‘Run pfSense’
- As I had an existing operating system installed at the time, I was prompted to hit ‘i’ to run the pfSense installer.
- At this point we don’t want to setup VLANS (we can do that later) so, select ‘n’ and continue
- At this point we want to assign our network cards to the various interfaces. My cards were detected as follows: xl0, dc0, fxp0
- BecausepfSense works best with the Intel chipset, I want to reserve that for the interface which will carry the most traffic (i.e. the LAN).
WAN = fxp0
LAN = xl0
OPT1 = dc0
- Once the interface bindings are made, the installer ticks through it’s configuration until it presents us with the first boot menu (figure 3 below)
- Select ’99’ to install pfSense to the hard drive


Install to Hard Drive:
- The first screen presented (Fig 4.) allows you to change a number of options, for our purposes we simply ‘Accept these Settings’ and press <Enter>
- The second screen in the installation again allows a number of options, but since we are happy to lose all existing data, we can select the ‘Quick/Easy Install’ (Fig 5.)
- At this point you are reminded (Fig 6.) that the installation is scripted and automated and that you will lose all data on the first hard drive. Select ‘OK’
- The installation will now tick away happily, doing its thing. (Fig 7.)
- We are selecting ‘Standard Kernel’ as we are not installing to an embedded device. (Fig 8.)
- The installation continues… (Fig 9.)
- Once configured, the installation needs to ‘Reboot’ (Fig 10.)
- What will flash up next on the screen (Fig 11.) is the default IP address of the LAN card, as well as the default username and password (admin / pfsense).
- The machine will reboot and the ‘Welcome to pfSense’ screen is displayed (Fig 12.). This is probably the last time you need to see anything directly connected to the box, as from here on out, we will be configuring the system via a web browser.


Next Article: pfSense Firewall [Part 2: Initial Configuration]