 Now that pfSense is connecting through your home LAN and serving addresses to the ‘Teenage Subnet’, we need to do some further tweaking to make sure we can keep our semi-hostile network safe as well as keeping an eye on our network traffic usage and what our users are accessing.
Install Packages
Under ‘System’ > ‘Packages’ click on the ‘Available Packages’ tab. From here we will be installing additional functionality to keep track of connections and block harmful content.
Arpwatch – What (new) devices are connecting to the network?
Select ‘arpwatch’ from the ‘Available Packages’ list and confirm the installation
Once installed, click ‘Services’ > ‘arpwatch’ and configure by selecting the ‘LAN’ interface (as this is the network we want to watch for new connections).
BandwidthD – Which devices are using the most bandwidth?
Select ‘bandwidthd’ from the ‘Available Packages’ list and confirm the installation
Once installed, click ‘Services’ > ‘BandwidthD’ and configure as follows:
- Select ‘Enable bandwidthd’
- Choose ‘LAN’ as the interface to monitor
- Ensure ‘Draw Graphs’ is checked (a picture is worth one thousand words after all)
- Click ‘Save’
ntop – Which devices are using the most bandwidth?
Select ‘ntop’ from the ‘Available Packages’ list and confirm the installation
Once installed, click ‘Diagnostics’ > ‘ntop settings’ and configure by choosing an Admin password, selecting the interface to monitor and clicking ‘Change’. Once the changes have saved, click the ‘Access ntop’ tab and you will be presented by all the options available within ntop (which is a subject in itself)
SNORT – Intrusion Detection System to protect against known threats
Select ‘snort’ from the ‘Available Packages’ list and confirm the installation
Once installed, click ‘Services’ > ‘Snort’ and configure as per the official pfsense HOWTO documentation on SNORT
SNMP (optional) – Centralised Telemetry Data
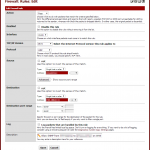
If you run an SNMP server on your network (such as Cacti or MRTG) then you may want to enable the SNMP service on your pfSense firewall. If the SNMP server will be on the LAN side of the network then configuration is quite straightforward. If your SNMP server sits on your internal network (i.e. the WAN interface of pfSense), then you will need to create a firewall rule (Fig. 2) to allow the SNMP traffic to flow (via port 161/UDP)
Because our existing monitoring server will be polling the SNMP service from the WAN side, we need to bind SNMP to our WAN interface [Fig. 1 – ‘Services’ > ‘SNMP’].
We also need to create a firewall rule to allow the traffic from our monitoring server [Fig. 2 – ‘Firewall’ > ‘Rules’ > ‘WAN’ tab]. The firewall rule will pass traffic to the WAN interface over UDP where the source is our monitoring server (we created an alias with the servers (WAN) IP address) and the destination is the IP address for the WAN interface on the pfSense firewall. We also restrict the destination ports to only UDP 161 (preset ‘SNMP’ in the drop down list).
Save, apply changes, then log into your monitoring server and check you can retrieve the SNMP data.
Filtering Traffic
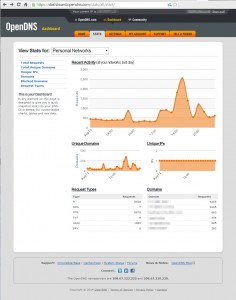
 When we setup our DNS server addresses in the previous article, we used the OpenDNS server addresses. OpenDNS allows registered users to set a level of parental filtering that they feel comfortable with. Note that if you are concerned about leaving a digital footprint, using this service will mean that you are sending your home networks browsing history to an external entity. They do however declare their opposition to mass censorship. There are a number of levels of filtering available, and these may well be sufficient for your needs, and you can monitor your network usage via the OpenDNS dashboard.
If you are after more granular control (or detail) then you will need to install a proxy server (such as Squid) and a filtering capability (such as DansGuardian, SquidGuard or Diladele Web Safety).
Squid, HTTPS Filtering and Diladele Web Safety
There is a very excellent guide by Rafael Akchurin which I worked through here. There are however a few edits to the process that I found were required since the guide was written in February of this year – such is the nature of the ever-evolving internet.
Before continuing, I would highly recommend reading and understanding the article which explains why filtering of HTTPS traffic may be desirable, as well as the mechanics which we will be employing to allow us to intercept and filter the SSL traffic. As an aside, I am currently morally torn by such interception, but have decided to throw my lot in and experiment with HTTPS filtering, more for my own learning than any immediate (perceived) need.
Step 1 – Install Squid built with SSL decryption support.
As per the HOWTO, install ‘squid3-dev’ from ‘System’ > ‘Packages’ > ‘Available Packages’. Reboot pfSense once complete, make the changes per the instructions. The author is far smarter than I, and heappears to actively engage with his readers and keep his content as correct as possible.
Step 2 -Install Diladele Web Safety for Squid Proxy
Create the user group and user per the instructions.
Also we need to grab the latest stable build for pfSense (which is based on FreeBSD) from http://www.quintolabs.com/download_freebsd.php. For our purposes, we’re using a FreeBSD 8 install on the x86_64 architecture, so our file can be downloaded from here. Once downloaded, we can upload the file to our pfSense box via ‘Diagnostics’ > ‘Command Prompt’ > ‘Upload’.
Installing the Python Django framework is where things came a little unstuck for me. (Unlike the author, I was installing on pfSense 2.1.4 x64 and Diladele Web Safety was at v3.3 release).
Open an SSH session ‘System’ > ‘Advanced’ > ‘Secure Shell’ (Enable), then login as root via your SSH client of choice. Before continuing to follow the guide, we need to set an environment variable so pkg_add can find the relevant files.
setenv PACKAGESITE http://ftp-archive.freebsd.org/pub/FreeBSD-Archive/ports/amd64/packages-8.3-release/Latest/
Now we can install the required files:
pkg_add -r python27 py27-sqlite3 py27-pip
Once the files have installed we install Django:
/usr/local/bin/pip install Django==1.5
Then Apache:
pkg_add -r apache22 ap22-mod_wsgi
then run the package we uploaded earlier
pkg_add /tmp/qlproxy-3.3.0-amd64.tbz
Make Apache start on boot:
cp /usr/local/etc/rc.d/apache22 /usr/local/etc/rc.d/apache22.sh
Edit /usr/local/etc/rc.d/apache22.sh
vi /usr/local/etc/rc.d/apache22.sh
and change the line:
[ -z "$apache22_enable" ] && apache22_enable="NO"
to
[ -z "$apache22_enable" ] && apache22_enable="YES"
Edit ‘/usr/local/etc/apache22/httpd.conf’ and change ‘Listen 80’ to ‘Listen 8080’, (otherwise we will have a clash with the webserver for pfSense). We will also uncomment ‘Include etc/apache22/extra/httpd-vhosts.conf’ while we are in there.
vi /usr/local/etc/apache22/httpd.conf
Edit ‘/usr/local/etc/apache22/extra/httpd-vhosts.conf’ changing ‘NameVirtualHost *:80’ to ‘NameVirtualHost *:8080’
vi /usr/local/etc/apache22/extra/httpd-vhosts.conf
Delete all of the VirtualHost example lines, replacing them with:
Include /usr/local/etc/apache22/extra/qlproxy_virtual_host
Note: You can use the vi command ‘dd’ to delete a full line, but beware, like most things in vi, badness happens very quickly, so be sure not to delete too much.
Restart apache
/usr/local/etc/rc.d/apache22.sh restart
login to http://192.169.1.1:8080 using ‘root’ and ‘P@ssw0rd’ credentials to finally see the Web UI of Diladele Web Safety.
Assuming it all works, you should be presented with a configuration screen.
Now we need to reboot the pfSense firewall to ensure everything is starting on boot as we’d expect.
Step 3 – Integrate Squid Proxy and Diladele Web Safety
As per the directions
Setup Automatic Updates and Reporting
As per the directions
Next Steps
- Setting the transparent proxy was (in pfSense 2.1.4) as simple as ticking the ‘Transparent Proxy’ box under ‘Services’ > Proxy Server’ > ‘General’ tab.
- Installing the certificate was an unfortunately manual process, and not very intuitive for mobile device browsers, so the ease of connecting a new device to the network (for friends/guests) is sadly left wanting. This is not a failing in the Diladele product, but is something that those wishing to filter content via SSL bumping will need to contend with.
- I would like to use LDAP on the home LAN to authenticate our users, thus allowing seamless reporting by user. But again, that is a project in itself.
Further Reading:
- Filtering HTTPS Traffic with Squid on pfSense 2.1.3
- Diladele Web Safety – Administrator’s Guide 3.3
- QuintoLabs Content Security for Squid Proxy / Diladele Web Safety (Google Group)

