First things first, this is NOT a failing with Dreamhost, it is merely an issue with poor/outdated documentation. I will attempt to resolve that shortcoming via this post.
When you sign up to Office 365 you are able to use your own domain for user authentication for the various services on offer.


As I am quite happy with my current site hosting, DNS, and mail and calendaring services, there was only a handful of options left that may be of some use.
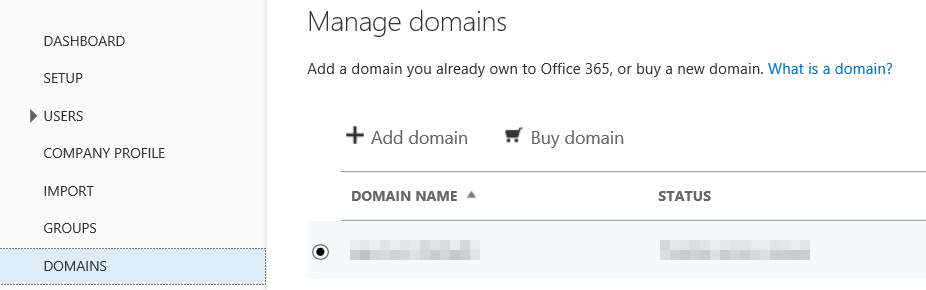
Adding a custom Domain to your Office 365 Subscription
On the ‘Domains’ page we (somewhat obviously) click ‘Add Domain’
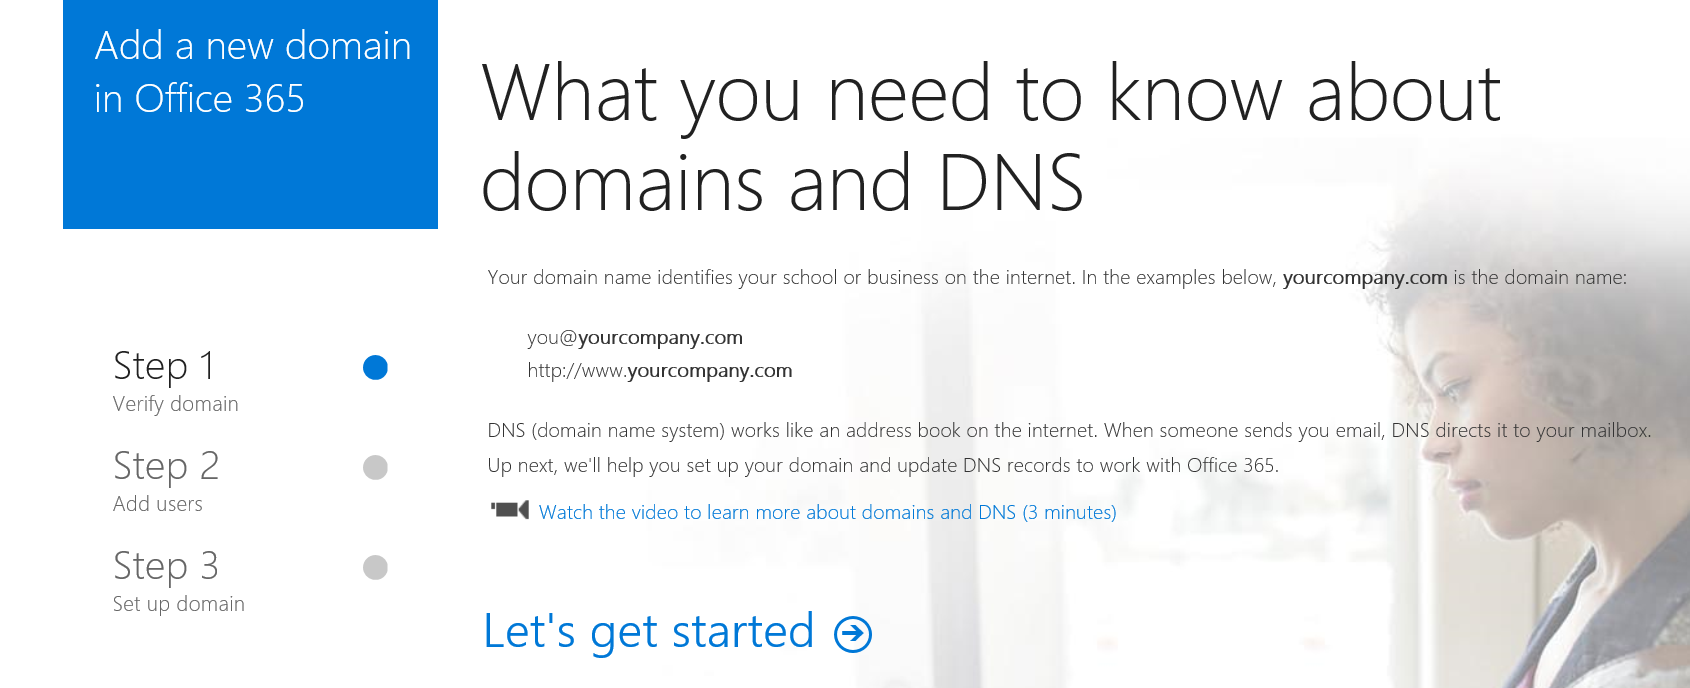
Verify Domain
On the first screen you receive a brief 101 on what a domain is, then you are invited to get started..
Enter in the domain you wish to associate with your subscription and click ‘Next’
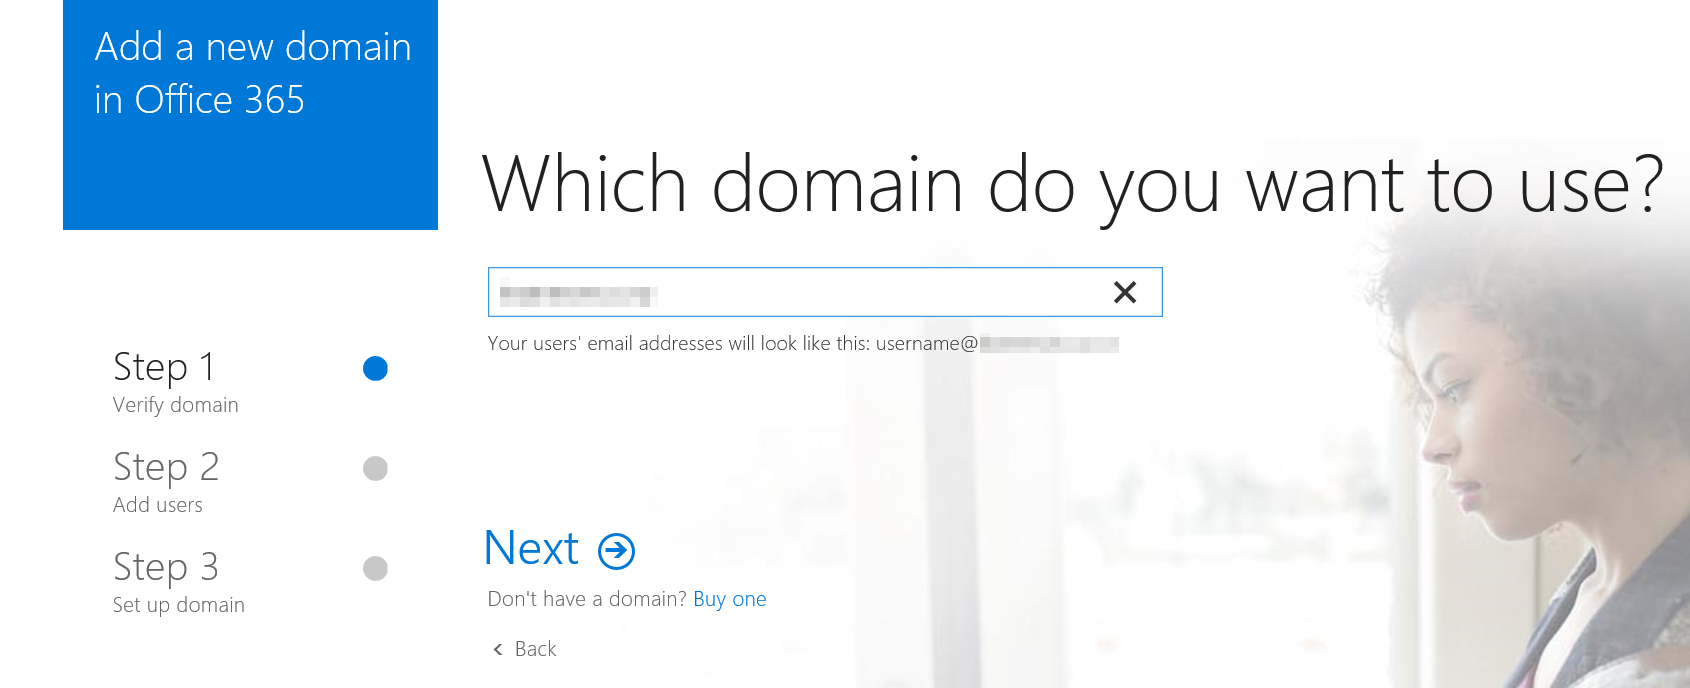
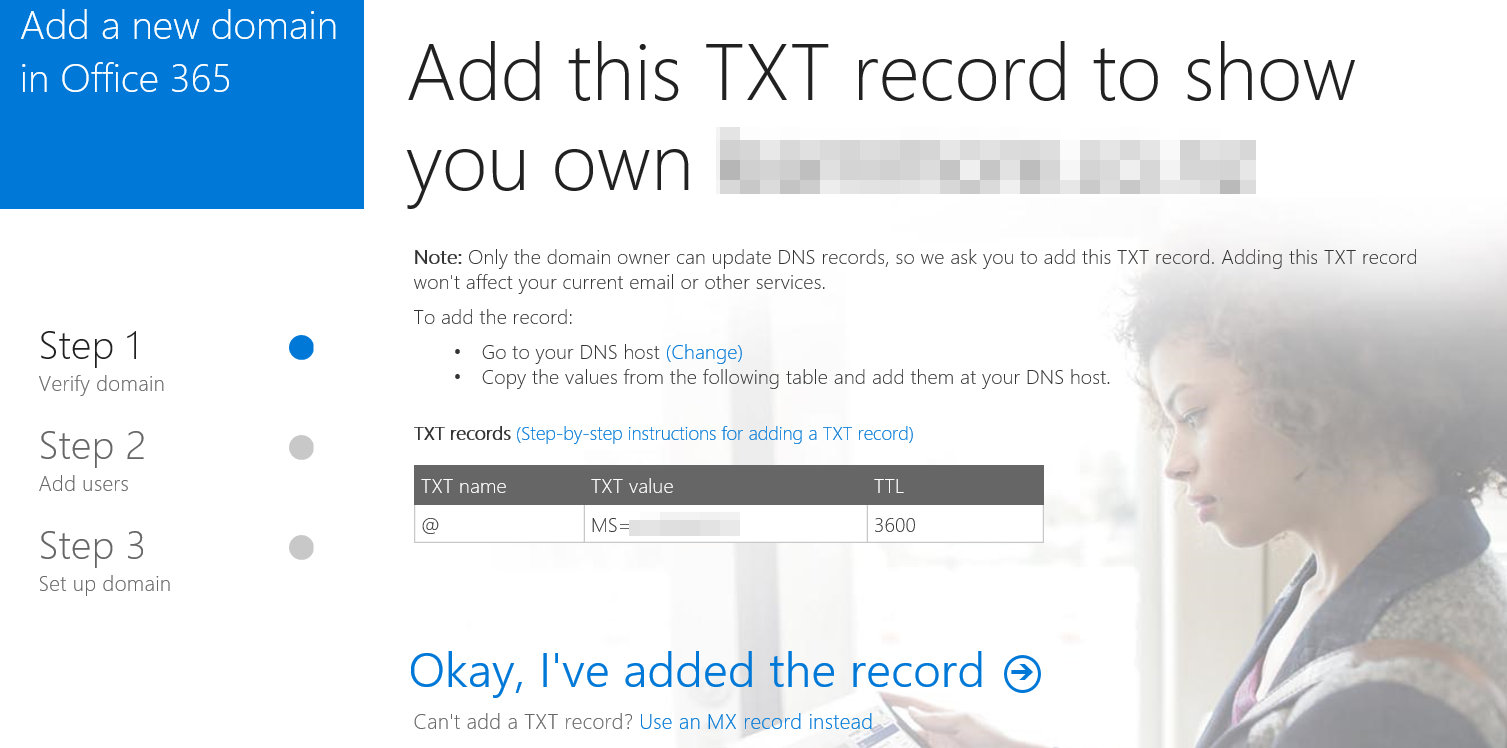
Microsoft will go off and query your DNS, then generate a value for you to insert into a TXT record via you DNS providers administration pages.
Creating the TXT record (Dreamhost)
Over on Dreamhost, log in to the panel (https://panel.dreamhost.com), select (1) Domains, (2) Manage Domains, then on the Domain you are adding the TXT record to, click (3) DNS
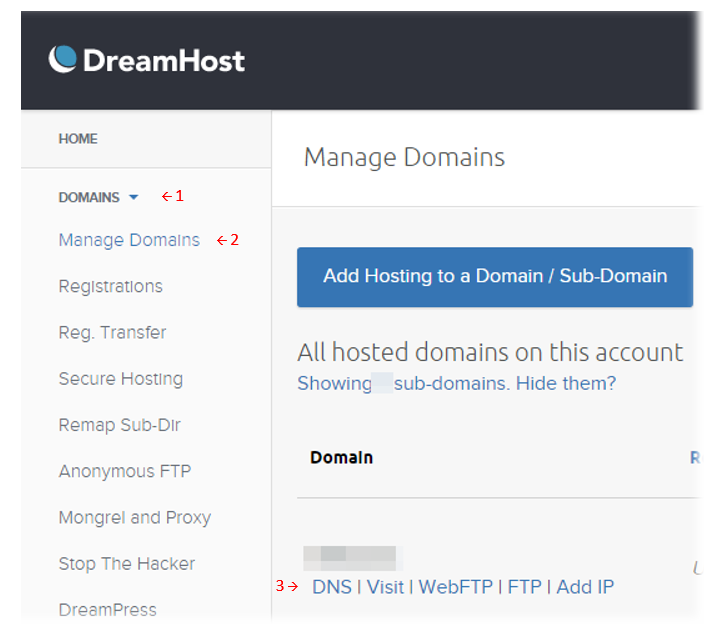
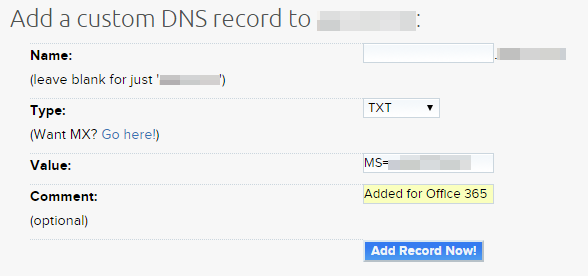
Now, while the MS instructions request and ‘@’ symbol to be inserted into the TXT Name: field, Dreamhost does not allow this (nor does it need it).
Leave ‘Name:’ blank, insert the ‘MS=msnnnnnnnn‘ value we were given and add an optional comment so we know why the record exists for future admin. Dreamhost does not require a TTL as it assigns an appropriate TTL on DNS records that it serves auto-magically.
Verify TXT record (Office 365)
After a few minutes (or more, depending on propagation speed) you can click the ‘Okay, I’ve added the record’ link. The site will check for the existence of the new TXT record and (when successful) a verification page will be displayed.

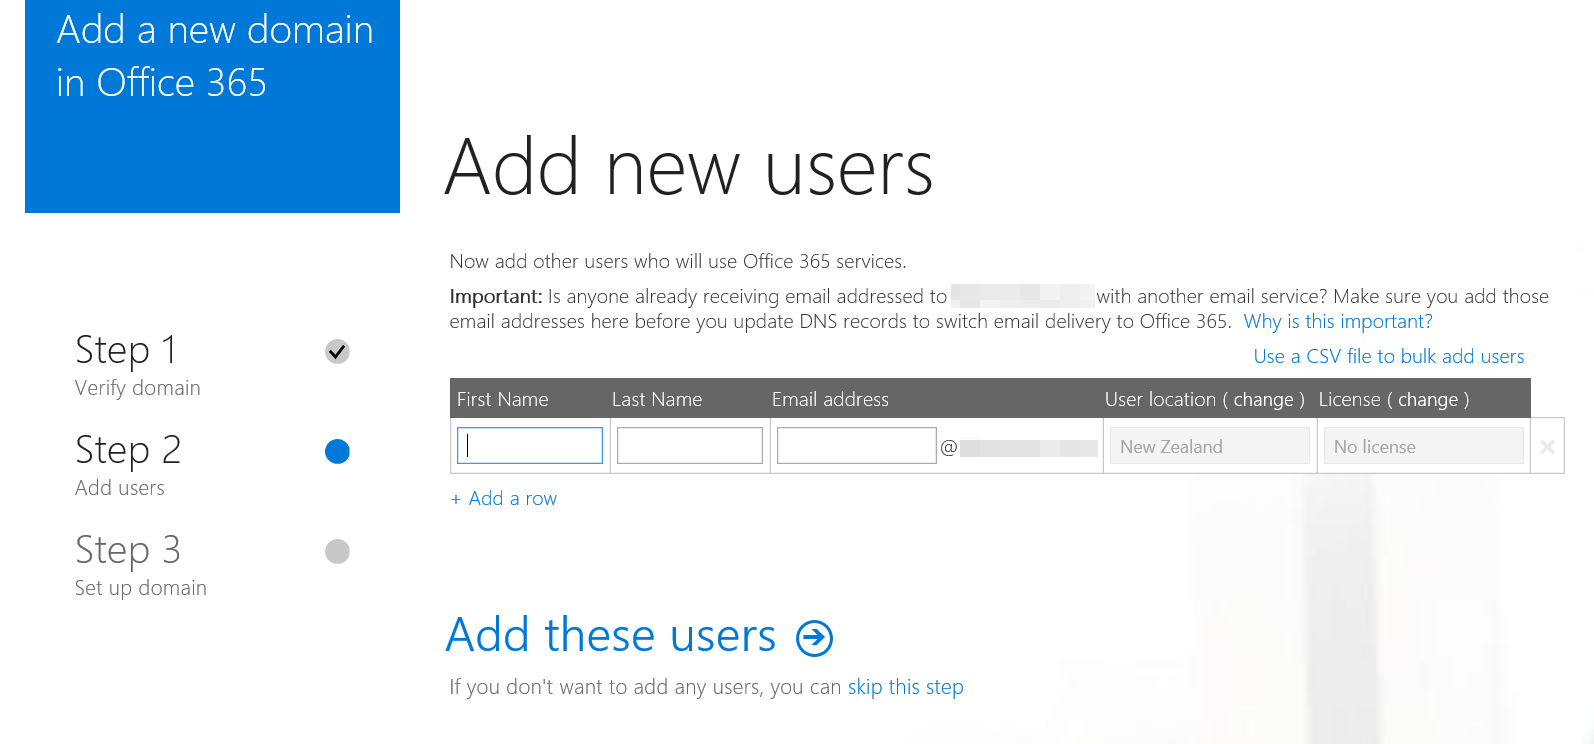
Adding Users
Once the domain is verified, you can add users to your subscription
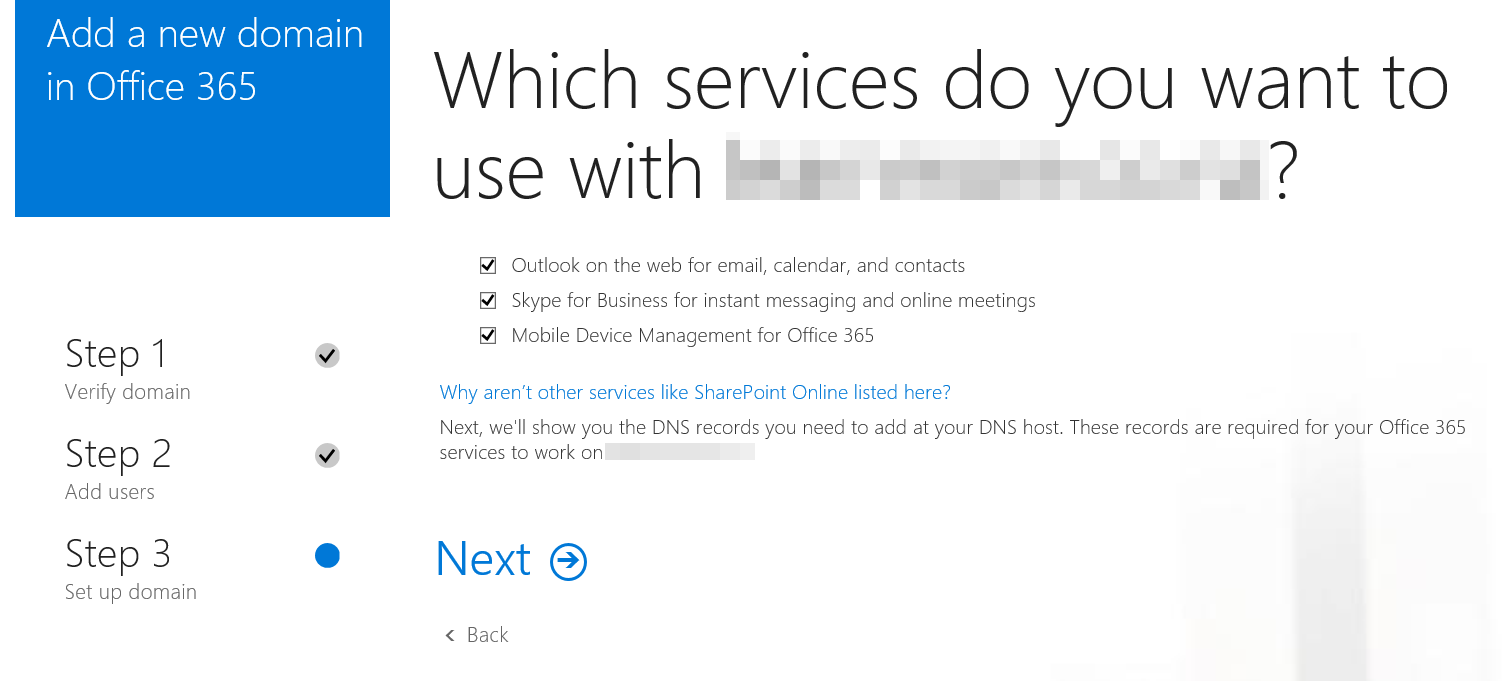
With users added, it’s time to select the Office 365 services you will utilise.
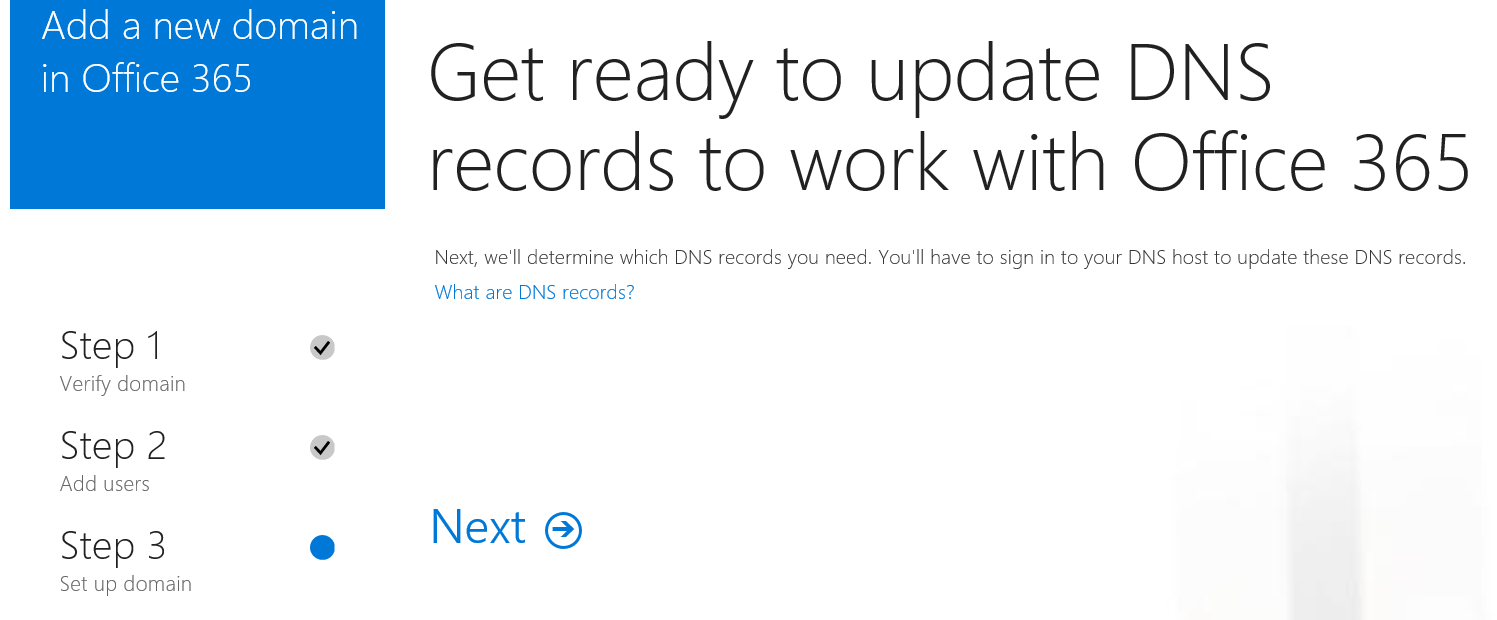
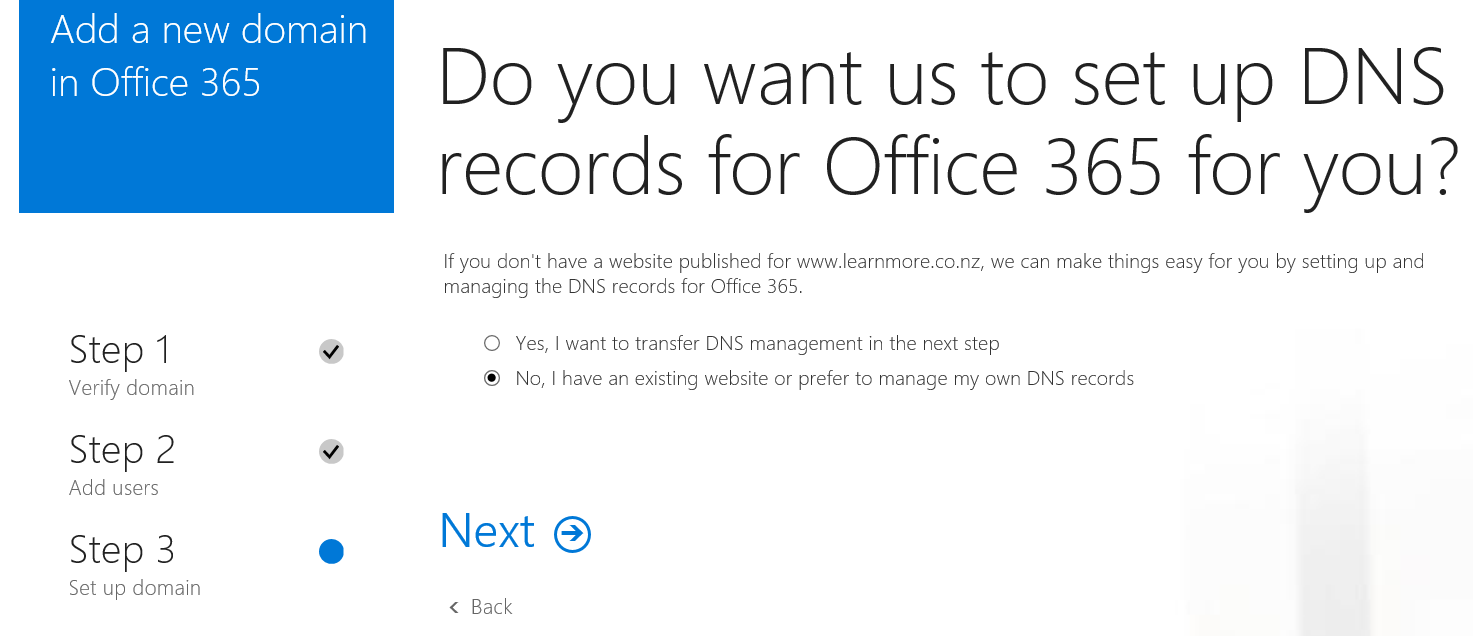
Transfer DNS management (or not)
Microsoft kindly makes the offer to take over the DNS management for you, you can accept or decline at this point. For the purposes of this HOWTO, we are going to decline – and thus manage our own DNS records.
Select Services
As we are happy with our existing email and device management solution, we are going to unselect those options and just configure the ‘Skype for Business..’ option.
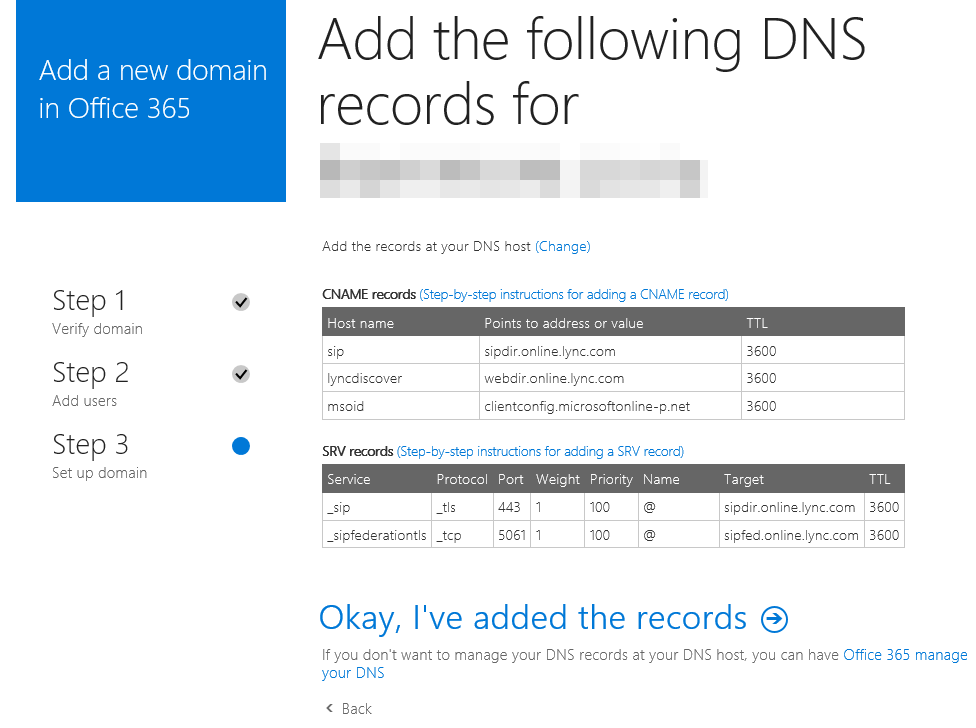
Adding DNS Records
The following records are required for the service, these will need to be provisioned over on the Dreamhost Panel.
Adding Custom Records (Dreamhost)
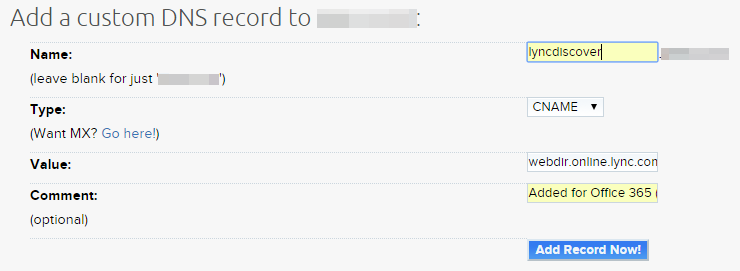
First up we have three CNAME records, these are all straight forward as shown;

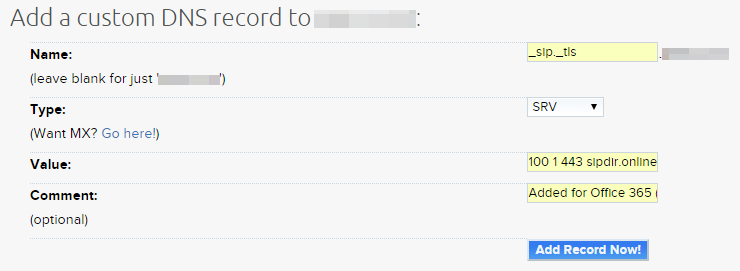
The second set of entries are SRV records and these are what have caused me to write this HOWTO. The way Dreamhost treats multiple value entries is easy enough to understand once you get your head around it, you can read the Dreamhost Wiki entry on SRV records here.
Briefly, the Name field contains the record name, followed by a period (‘.’) then the protocol. The Value field is delimited by a space and is in the order of [priority] [weight] [port] [target].
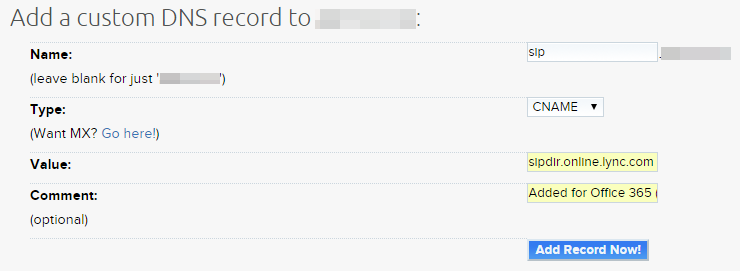
The first name record is as follows;
Name: _sip._tls
Value: 100 1 443 sipdir.online.lync.com
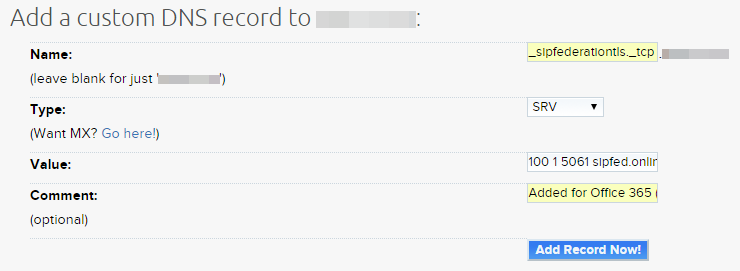
The second entry is;
Name: _sipfederationtls._tcp
Value: 100 1 5061 sipfed.online.lync.com
Once the records are entered on Dreamhost, you can click the ‘Okay, I’ve added the records’ link. Assuming the DNS changes have propagated and are visible to the Microsoft service, you should receive an all clear and your services should begin to work.
Comments
One response to “Office 365 DNS (or; Nightmares with Dreamhost)”
Interesting…. my Skype SIP service has stopped working recently; perhaps I Microsoft is giving me a subtle hint to move to Office 365 services.